

Your smartphone is now more accurate than a bulky hardware scanner and significantly faster than hours spent manual tracing in Illustrator. For many Australian designers, the transition from a physical workshop to a digital production line is often stalled by the fear of losing scale accuracy or facing communication breakdowns with offshore factories. You've likely experienced the frustration of sending a digital file only to have the first sample return with distorted proportions. This creates a costly bottleneck in an industry that generates A$35 billion annually and demands absolute precision.
This guide shows you how to digitize patterns from photos to create production-ready DXF or SVG files using tools you already own. You'll master a workflow that ensures 100% scale accuracy, allowing for a seamless transition to automated grading and professional tech packs. We'll examine how to bypass expensive hardware and move straight from a single photo to a digital asset that's ready for the factory floor.
Key Takeaways
- Modernise your Australian design workflow by replacing bulky hardware scanners and cardboard slopers with efficient smartphone-based capture.
- Learn how to digitize patterns from photos with 100% scale accuracy by using software that automatically corrects lens and perspective distortion.
- Eliminate hours of manual tracing in Illustrator and reduce the risk of fit inconsistencies caused by imprecise mouse clicks.
- Master the precise workspace setup and camera positioning required to capture production-ready pattern images in any lighting environment.
- Accelerate your time-to-market by converting digital assets into full size-runs using automated grading and production-ready DXF exports.
Why Digitising Patterns from Photos is Redefining Australian Apparel Workflows
The Australian fashion industry generates A$35 billion in annual revenue, yet many brands are still held back by analogue processes. Traditional paper patterns are becoming a liability in a high-speed market. As designers adopt a sovereign-hybrid model, the ability to digitize patterns from photos has become a fundamental requirement for scaling production. This shift isn't just about convenience; it's about building a technology-enabled supply chain that can compete globally.
The Death of the Cardboard Sloper
Physical slopers are vulnerable. They warp in humidity, tear with repeated use, and require significant physical storage space. For a boutique label or a growing SME, managing a library of cardboard blocks is a logistical bottleneck. Manual pattern making relies on physical presence, making it impossible to collaborate effectively across different locations. By moving to a digital archive, you protect your intellectual property from physical degradation. Cloud-based management allows you to organise your entire collection in a searchable, secure environment. It's a transition from a cluttered workshop to a lean, modern design centre.
Modernising the "Pattern to Production" Pipeline
Digital files are the primary language of 2026 manufacturing. When you engage in Pattern digitizing, you create a precise blueprint that eliminates the guesswork often found in manual tracing. This accuracy is vital for meeting the Consumer Goods (Care Labelling) Information Standard 2023 and preparing for upcoming mandatory clothing stewardship levies. Australian brands are increasingly moving toward paperless design rooms to reduce textile waste and improve sustainability credentials.
The speed advantage is undeniable. Capturing a pattern via a smartphone camera allows you to move from a physical draft to a production-ready file in minutes rather than hours. You don't need expensive hardware; you need a workflow that prioritises accuracy and readiness. This process allows for instant communication with offshore factories. Instead of waiting days for international couriers to deliver physical samples, you can send a digital file that is ready for automated grading and immediate production. It's a fundamentally better way of working that empowers designers to focus on creativity rather than administrative hurdles.
The Science of Accuracy: How Software Corrects Photo Distortion
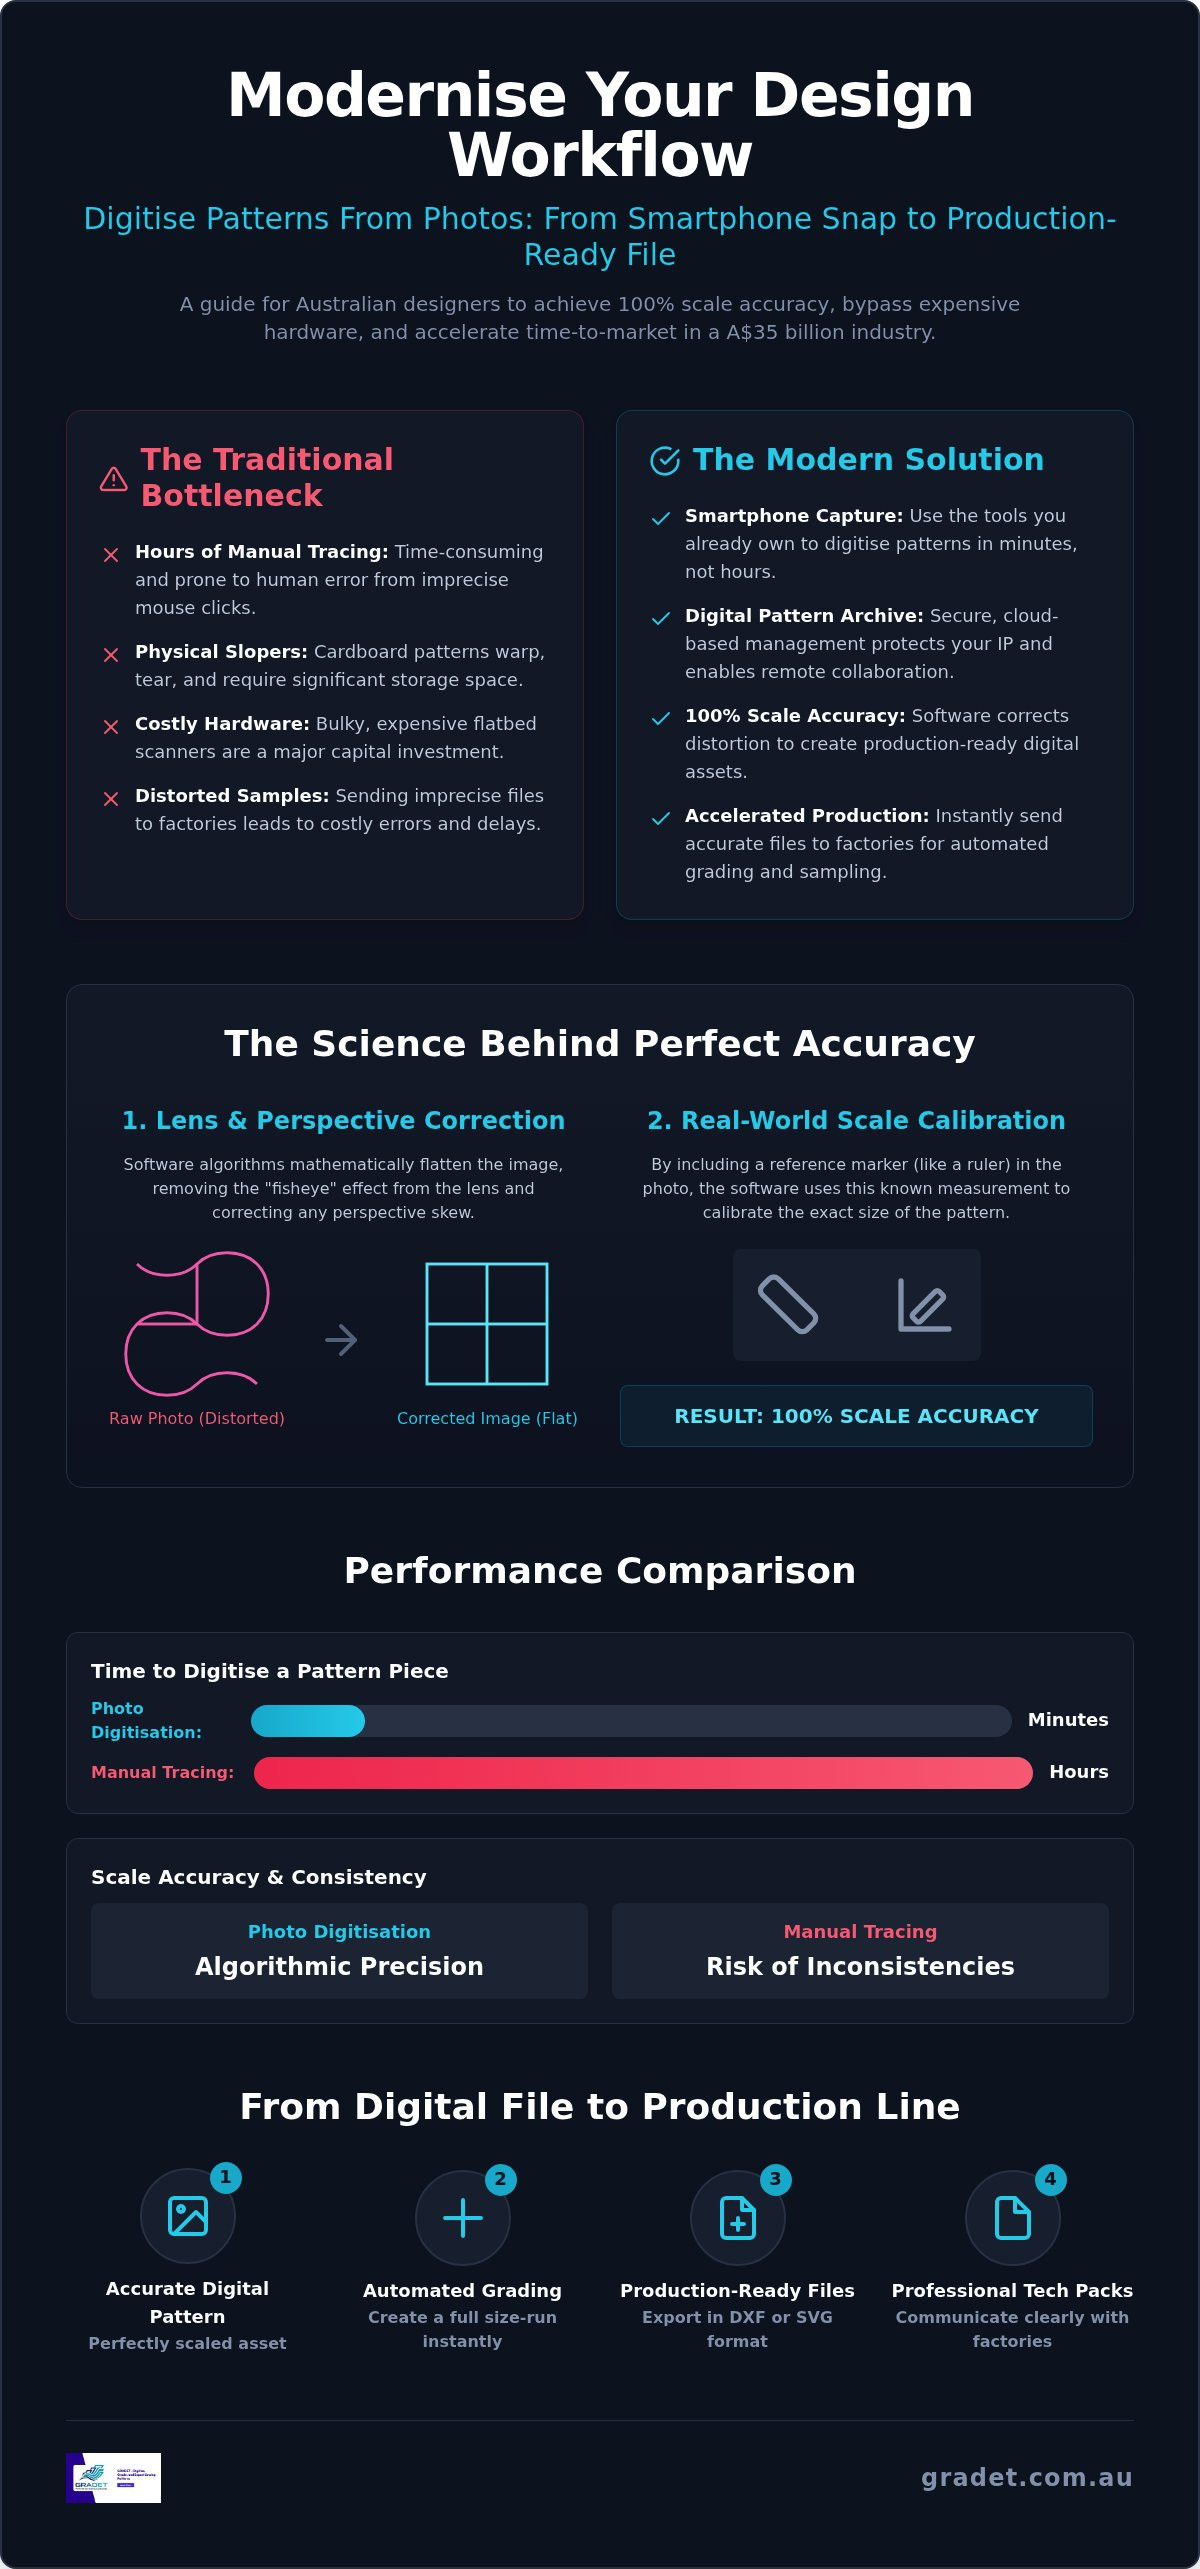
A raw smartphone photo is a collection of pixels, not a set of measurements. It lacks the mathematical certainty required for a garment to fit correctly. When you attempt to digitize patterns from photos, you're fighting against the physical limitations of camera optics. Without professional correction, a photo is simply a visual reference rather than a production-ready asset.
Understanding Perspective and Lens Distortion
Smartphone lenses are designed for wide-angle versatility, which naturally creates a "fisheye" effect. This means the centre of your pattern appears slightly larger than the edges. If you were to trace this raw image manually, the resulting garment would have distorted seams and incorrect proportions. Perspective distortion also occurs if your phone isn't perfectly parallel to the pattern surface, making one side of the piece appear longer than the other.
GRADET algorithms solve this by mathematically "flattening" the image. The software identifies these optical curves and re-aligns the pixels into a true geometric plane. This transformation turns a skewed snapshot into a calibrated digital scan that maintains the integrity of your original design. A comparative study on digital pattern-making confirms that this algorithmic precision is essential for maintaining the accuracy required in modern apparel manufacturing.
The Role of Reference Markers
Software cannot guess the size of your pattern based on pixels alone. It needs a physical anchor to understand real-world dimensions. By placing a known measurement, such as a standard ruler or a specific calibration square, within the frame, you provide the software with a scaling constant. Reference markers are the anchor for digital scale, providing a known physical measurement that software uses to calibrate every pixel in the image.
Once the software identifies these markers, it calculates the exact distance between every point on your pattern. This ensures 100% scale accuracy regardless of how high you hold your phone or what zoom level you use. If you want to see how this precision translates to your own workflow, you can explore the pattern digitizing tool to test the accuracy for yourself.
From Raster Pixels to Vector Lines
The final stage of the science is vectorisation. A photo is a raster image, which is made of dots that blur when enlarged. Production equipment, like automated cutters or grading software, requires vector files such as DXF or SVG. These files use mathematical paths that remain crisp at any size. Professional digitisation software detects the high-contrast edges of your pattern and converts them into these clean, editable lines. This results in a file that is ready for instant grading and manufacturing without the need for manual cleanup or "guessing" where a curve ends.
Photo Digitisation vs. Manual Tracing: A Performance Comparison
Choosing between manual tracing and automated digitisation is a choice between legacy bottlenecks and modern scalability. While many designers still rely on Adobe Illustrator for pattern work, this generic approach introduces significant risks to fit and production readiness. When you digitize patterns from photos, you replace subjective manual clicks with algorithmic certainty.
Efficiency Metrics for Scaling Brands
A complex pattern piece can take up to four hours to trace manually in vector software. This process involves painstaking point-to-point clicking and constant zooming to ensure line alignment. In contrast, a digital upload takes less than five minutes. This speed allows brands to move from a physical prototype to a full size-run tech pack in a single afternoon. Reducing human error is the primary driver here; manual tracing often leads to microscopic deviations that compound during the grading process. By removing the manual "middleman," you ensure the digital file is a perfect mirror of your physical craftsmanship.
Why Generic Design Software Falls Short
Graphic design tools lack the specialised features required for professional apparel manufacturing. They don't natively understand notches, grain lines, or seam allowances. When a designer manually digitises in a generic tool, they must invent workarounds for these technical markers. This creates a "grading gap" where the file looks correct but fails when scaled across different sizes. Recent research on automatic pattern generation highlights how dedicated software maintains these technical relationships, ensuring that a size 8 and a size 18 maintain the same fit proportions.
Factories and offshore manufacturing partners prefer industry-standard DXF or SVG files over generic PDFs. A PDF is a visual document; a DXF is a set of instructions for an automated cutter. If your file requires manual cleanup at the factory level, you face increased lead times and potential surcharges. Investing in a professional digitize patterns from photos workflow ensures your files are production-ready the moment they leave your studio. This transition eliminates the need for expensive hardware while providing a level of technical detail that generic design software simply cannot match.
Step-by-Step: Capturing Production-Ready Pattern Photos
Capturing a high-quality image is the most critical step to digitize patterns from photos successfully. A sloppy photo leads to a sloppy file. You must treat your workspace like a professional scanning centre to ensure the algorithm has the data it needs to generate a millimetre-perfect result. Precision at the start of the workflow prevents hours of manual cleanup later.
Preparing the Pattern and Environment
Contrast is your most important tool. If your pattern is manila or white, place it on a dark, non-reflective surface. If it's dark cardboard, use a light-coloured table. This sharp contrast allows the software to identify the pattern edges instantly without confusion. Eliminate harsh, direct sunlight that creates long shadows across the paper. Shadows are often mistaken for cut lines by detection algorithms, which leads to jagged or inaccurate digital edges. Secure the corners of your pattern with small weights or low-tack tape. A curled edge creates a "short" measurement in the digital file, so ensure every millimetre is perfectly flat against the surface before you take the shot.
Camera Techniques for Maximum Precision
Position your smartphone or camera at a perfect 90-degree angle to the pattern. While modern software corrects slight tilts, starting with a parallel shot provides the highest resolution for technical details like notches and drill holes. Use a tripod or an overhead mount to maintain consistency across multiple pieces in a collection. Centre the pattern piece in the viewfinder to keep the most important details away from the lens edges where optical distortion is naturally highest. This ensures the geometric centre of your design remains the most accurate part of the image.
Before you press upload, perform a quick clarity check: if you can't clearly see the grain line and every notch in the photo preview, the software won't be able to detect them either. This simple visual audit saves significant time in the verification stage.
Reference Markers and Verification
Don't forget your reference markers. Place your ruler or calibration square close to the pattern piece but not touching it. This physical anchor allows the system to scale your pixels to real-world dimensions. Once you've captured a sharp, high-contrast image, you can upload your photo to the pattern digitizing tool for immediate processing. After the file is generated, verify the digital output against your physical piece. Check that internal markings, such as darts and pocket placements, have transferred accurately. A professional workflow relies on this final verification to ensure your digital sloper is ready for the grading stage.
From Digital File to Production Line: Grading and Tech Packs
Transitioning from a physical block to a digital file is a significant milestone, but the real efficiency gains occur in the post-digitisation phase. Once you digitize patterns from photos, you unlock the ability to manipulate your designs with mathematical precision. This digital foundation serves as the engine for your entire production cycle, transforming a single sample into a market-ready collection. It's the difference between owning a static drawing and a dynamic manufacturing asset.
Automated Pattern Grading for Rapid Scaling
Traditional grading is a notorious bottleneck. It often requires hours of manual recalculation for every size in the range. Modern software replaces this tedious process with automated grading rules that apply instant size-runs. You can move from a base size 10 to a full range from 6 to 20 in seconds. This speed is vital for Australian brands looking to capitalise on fast-moving trends without the traditional lead times associated with manual pattern making.
Fit consistency is the primary benefit here. Manual grading often introduces slight deviations that affect the silhouette as sizes increase. Automated systems maintain the original design intent across the entire spectrum. GRADET simplifies these complex rules, allowing designers to manage their own grading without outsourcing to expensive external services. This sovereign capability is essential for brands adopting a hybrid manufacturing model, where keeping technical control in-house ensures quality remains high regardless of where the final garment is sewn.
Building the Perfect Tech Pack
A digital pattern is only one component of a successful production run. Factories require comprehensive tech packs to ensure every detail is executed correctly. By integrating your digital patterns with garment specifications, you create a single source of truth for your manufacturing partners. This level of documentation reduces factory queries and prevents costly sample errors. It's about providing a level of transparency that analogue methods simply cannot match.
High-quality exports are non-negotiable. Factories prefer DXF or SVG files because they integrate directly with automated cutting tables. Providing these files alongside your tech packs establishes you as a professional, production-ready brand. This reduces the "communication breakdown" pain point often cited by designers working with offshore facilities. If you're ready to streamline your workflow, you can optimise your production with GRADET’s all-in-one platform. This transition from physical paper to versatile digital assets ensures your brand is ready for the precision and speed of the 2026 apparel market.
Transform Your Workshop into a Digital Production Engine
Adopting a digital-first approach is no longer optional for Australian designers who want to scale. By learning how to digitize patterns from photos, you eliminate the technical bottlenecks of manual tracing and the physical risks of paper degradation. You've seen how algorithmic precision corrects lens distortion, ensuring your digital slopers maintain 100% scale accuracy for every production run. This transition empowers you to focus on design while the technology handles the technical heavy lifting.
The path to a more efficient studio is clear. You can now achieve automatic pattern grading in seconds and generate production-ready file exports that factories actually want to use. With cloud-based sloper management, your entire pattern library is secure and accessible from anywhere. It's time to bridge the gap between traditional craftsmanship and modern precision. Start digitising your patterns with GRADET today and take full control of your manufacturing pipeline. Your more efficient, scalable future starts with a single photo.
Frequently Asked Questions
Is a smartphone photo really accurate enough for professional pattern grading?
Yes, provided you use specialised software to correct lens distortion and perspective. Modern smartphone cameras have high resolution that captures fine technical details like notches and drill holes. The accuracy doesn't come from the photo alone but from the algorithms that flatten the image. This process ensures the base size is precise, which is the foundation for successful automated grading across your entire size range.
What file formats should I export for my clothing manufacturer?
Most professional clothing manufacturers and offshore factories require DXF or SVG files. These are vector-based formats that automated cutting machines can read directly. While PDFs are useful for visual reference or home printing, they lack the technical data needed for industrial production. Exporting in DXF ensures your pattern maintains its geometric integrity, including seam allowances and internal markings, when opened in the factory's CAD system.
Do I need a special background or mat to digitise my patterns from photos?
You don't need expensive equipment, but you do need high contrast between your pattern and the surface. Use a dark table for light paper patterns or a light surface for dark cardboard slopers. This allows the software to clearly distinguish the edges. Ensure the surface is flat and non-reflective to prevent glare. A simple, consistent background is all that's required to successfully digitize patterns from photos for professional use.
Can I digitise cardboard slopers as easily as paper patterns?
Cardboard slopers are actually ideal for photo digitisation because they stay flat and have crisp, durable edges. The software detects the high-contrast boundary of the cardboard against your workspace surface. This eliminates the issues of paper curling or tearing, which can sometimes distort digital captures. Simply ensure the cardboard is clean and any internal markings or notches are clearly visible before you take the photo for upload.
How do I ensure the scale is 100% correct in the digital file?
Accuracy is guaranteed by including a physical reference marker, like a standard ruler or a calibration square, in the photo. The software uses this known measurement to calculate the real-world dimensions of every pixel. Without this anchor, the system cannot determine the actual size of the pattern. By calibrating the image against a physical object, you ensure the digital output is a 1:1 replica of your original physical design.
What is the difference between photo digitising and using a digitising tablet?
Photo digitisation is significantly faster and requires no specialised hardware beyond your smartphone. Digitising tablets require you to manually trace every edge with a puck, which is time-consuming and prone to human hand-shake errors. Capturing a photo takes seconds and uses algorithms to detect edges with mathematical precision. This modern workflow removes the physical space constraints and high costs associated with traditional large-format digitising tablets and hardware.
Can I use these digital files in other CAD software like CLO3D or Gerber?
Yes, the production-ready DXF and SVG files are compatible with all major industry CAD platforms. Whether you're moving into 3D modelling in CLO3D or sending files to a factory using Gerber or Lectra, these universal formats ensure seamless integration. This interoperability allows you to digitize patterns from photos once and use the resulting assets across different stages of your design and manufacturing pipeline without needing to reformat.
How much time can I save by switching from manual tracing to photo digitisation?
Designers typically save several hours per pattern piece by moving away from manual tracing in generic software. A manual trace in Illustrator can take up to four hours for complex designs, whereas a photo upload and conversion takes less than five minutes. When you factor in automated grading for a full size-run, the time savings compound. This allows your team to move from a physical prototype to a factory-ready tech pack in one afternoon.
